
How to root AVD (Android Virtual Device) with Magisk
It is possible to root AVD (Android Virtual Device) with Magisk using rootAVD script. It works on Windows/Mac/Linux
Requirements:
- Android Studio. See tutorial how to install it: Install Android Studio | Android Developers
- Have at least one AVD created and running with boot option set to “Cold boot”: Create and manage virtual devices | Android Studio | Android Developers
- A working Internet connection for the Menu
- Be able to use terminal/cmd
- rootAVD script (Direct link): https://gitlab.com/newbit/rootAVD/-/archive/master/rootAVD-master.zip
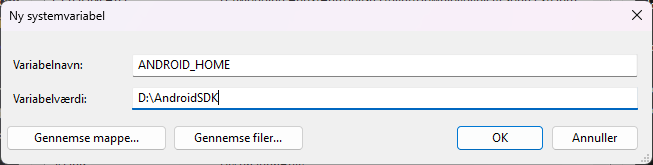
- Have ANDROID_HOME enviornment path set of your SDK path. Check the documentation for your operation system to learn how. Reference: Environment variables | Android Studio | Android Developers
Note:
You can’t use ARM images on x86 computer or vice versa.
ARM only zygisk modules will not work on x86 AVD. Because Zygisk injects zygote, ARM translation can’t be supported, it is by design. Currently only x86 supported modules will work on x86 systems, and only ARM supported modules will work on ARM systems. If you really want to run ARM based AVD, buy a computer with ARM processor (e.g Macbook with silicon processor)
Additional notes taken from newbit:
- 64 Bit Only Systems needs Magisk 23.x
- In the Menu, you can choose between the newest Magisk, Canary, Stable and Alpha, Version.
- With the new Option s, you can see and download any other Versions of Magisk
- Once choosen, the script will make that Version to your local one.
- Prebuilt Kernel and Modules will be pulled from AOSP
- Starting Magisk from Terminal via adb shell monkey -p com.topjohnwu.magisk -c android.intent.category.LAUNCHER 1
- API 28 (Pie) is not supported at all -> because
- Magisk Versions >= 26.x can only be proper installed with the FAKEBOOTIMG argument
- due to the New sepolicy.rule Implementation
- Android 14 needs Magisk Version >= 26.x to be rooted
Rooting AVD
Ensure that your target instance you want it to be rooted, have boot options is set to Cold boot to ensure stability. Edit the instance by
clicking on 3 dots > Edit
Click Show Advanced Settings and choose "Cold boot"
Run the instance
Once you have downloaded rootAVD, extract it to your desired location
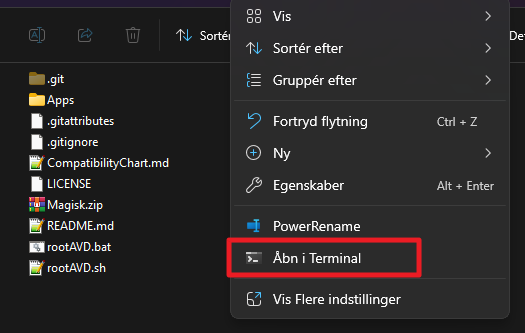
Open Terminal/Powershell/CMD from the location of rootAVD
type the following
Code:
./rootAVD ListAllAVDs
and hit enter to list all installed AVDs
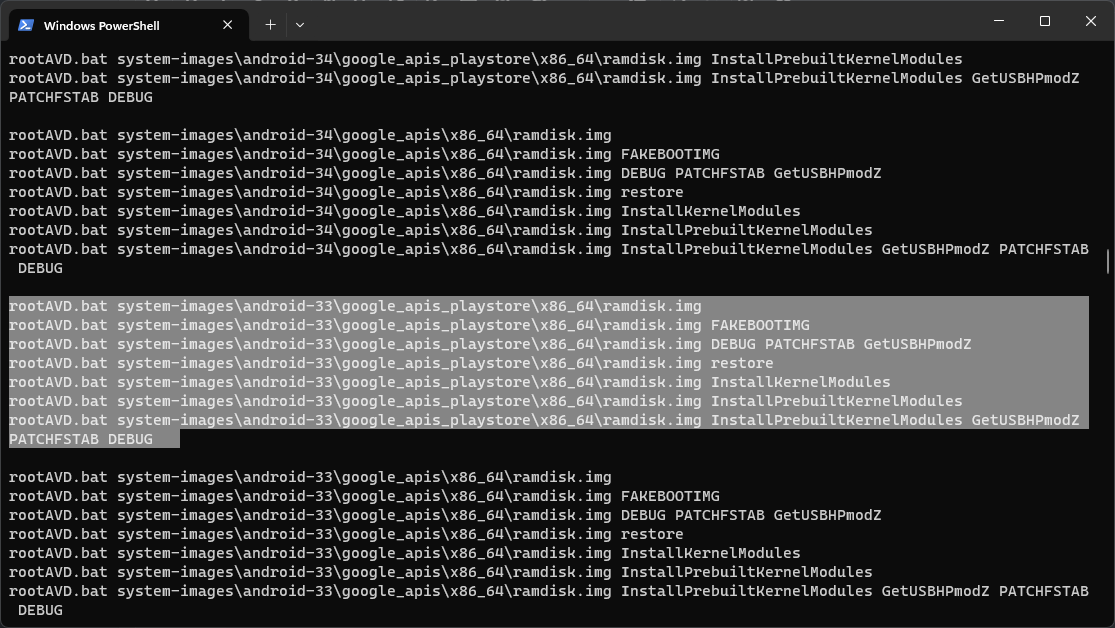
In this case, my target is Android 13 image with Play Store, so I will use one of these commands
Code:
rootAVD.bat system-images\android-33\google_apis_playstore\x86_64\ramdisk.img
rootAVD.bat system-images\android-33\google_apis_playstore\x86_64\ramdisk.img FAKEBOOTIMG
rootAVD.bat system-images\android-33\google_apis_playstore\x86_64\ramdisk.img DEBUG PATCHFSTAB GetUSBHPmodZ
rootAVD.bat system-images\android-33\google_apis_playstore\x86_64\ramdisk.img restore
rootAVD.bat system-images\android-33\google_apis_playstore\x86_64\ramdisk.img InstallKernelModules
rootAVD.bat system-images\android-33\google_apis_playstore\x86_64\ramdisk.img InstallPrebuiltKernelModules
rootAVD.bat system-images\android-33\google_apis_playstore\x86_64\ramdisk.img InstallPrebuiltKernelModules GetUSBHPmodZ PATCHFSTAB DEBUG
For now, we will only use this command to root it. We would type “./”, copy the first line of command from the terminal and paste it in the terminal and add “s” at the end
Code:
./rootAVD.bat system-images\android-33\google_apis_playstore\x86_64\ramdisk.img s
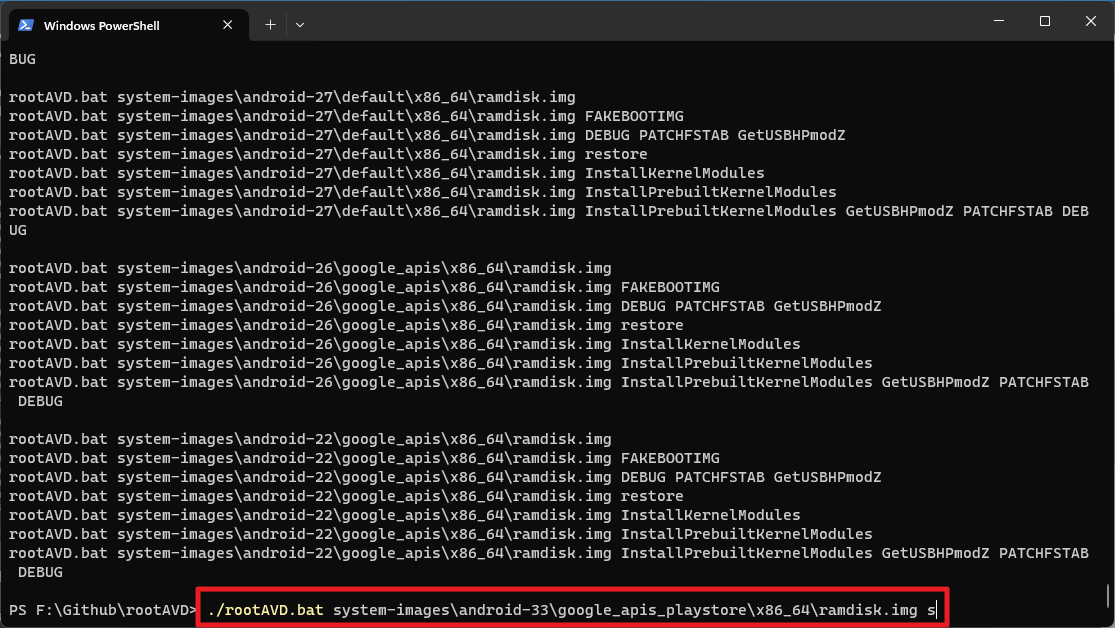
then hit enter
When asked, choose what version of Magisk you want it installed by typing the number
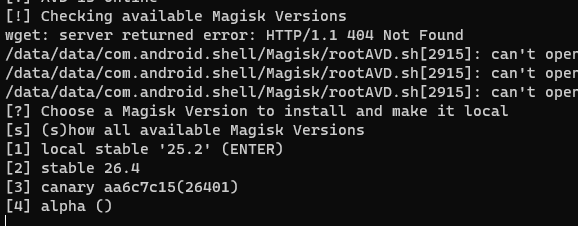
Once choosen, the script will continue and will make that version to be installed
Wait and do not touch anything until the process is completed. If the AVD doesnt shut down, do it manually!
Start the AVD again, if it won’t boot, try cold boot by clicking on 3 dots > Cold Boot Now

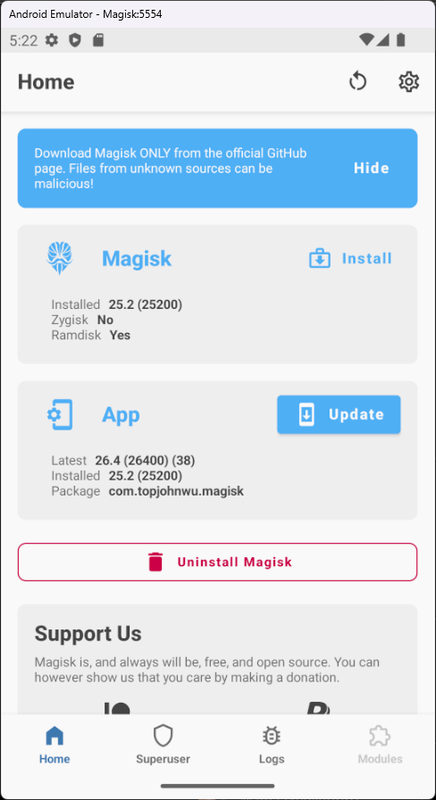
You will now see Magisk app on the app drawer. Open it. If it prompt about additional setup, just click OK

The root is completed!
Updating Magisk
You can’t update Magisk directly from the app. Instead, you need to re-run the rootAVD script again. Just this command line will do the job
Code:
./rootAVD.bat system-images\android-33\google_apis_playstore\x86_64\ramdisk.img s
2 Ways to boot the AVD into Safe Mode
- 1st Way - If the AVD still boots normal:
- Tap and Hold the Power Button until the 3 Options appear
- Tap and Hold the Power Off Button until Reboot to safe mode appears
- 2nd Way - If the AVD stuck while booting (blackscreen):
- Tap and Hold the Volume Down Button
- The Time Window is between the Launching Emulator Bar is approx half way until the Google Boot Screen appears
- Confirmation
- On the Bottom Left Corner reads: Safe mode
BONUS
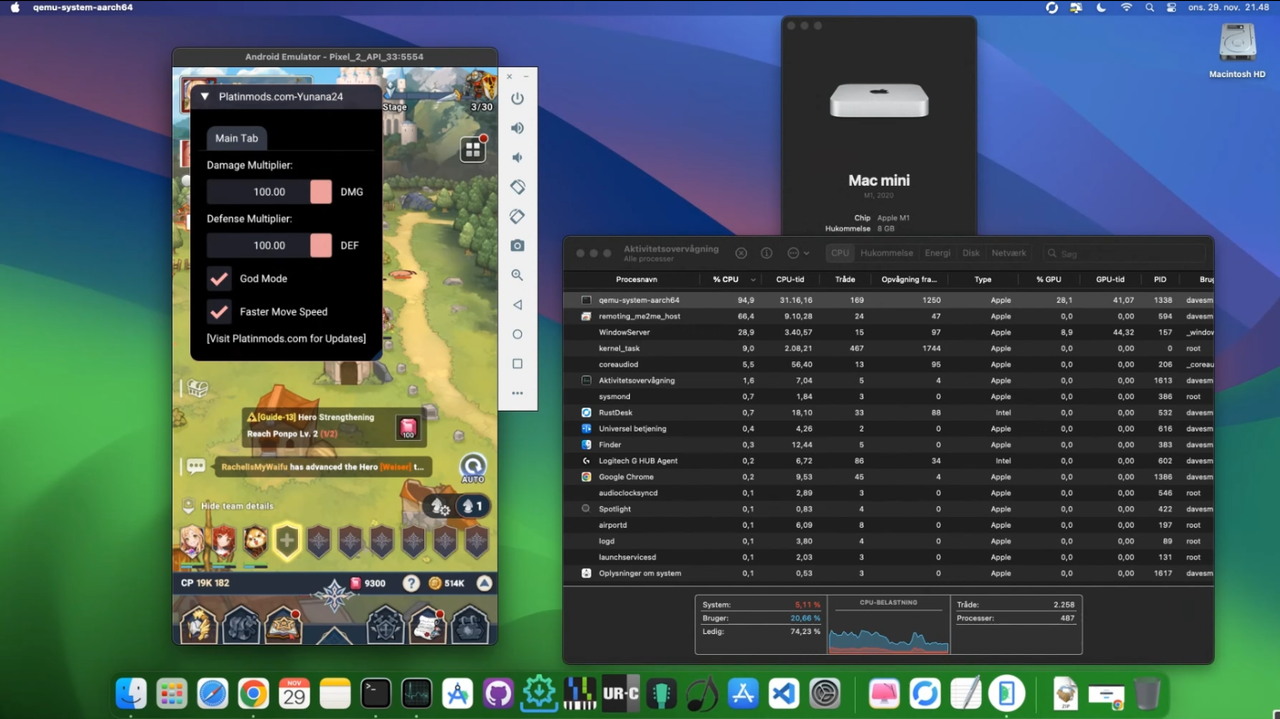
If you are using an ARM computer (Mac, Raspberry Pi, etc), you can use ARM images instead x86 images so you can use ARM only modules like ImGUI zygisk module. NO x86 involved. I’m lucky to own a Mac mini M1 (2020) with silcone processor and I was able to use ImGUI by @Yunana24 perfectly


Comments
Post a Comment